


Steps to Measure Hitch Receiver Size
Posted by Carlton Clark on
Measure the internal width of your hitch receiver tube, never the outside. This single step ensures safe towing, proper lock fitment, and prevents rattling or costly returns. Sizes vary (1.25", 2", 2.5", 3"), so precision matters. Always clean and measure directly inside.
To measure your hitch receiver size correctly:
-
Locate the Receiver: Find the square steel tube attached to your vehicle’s frame.
-
Clean the Opening: Clear out any rust, debris, or reducer sleeves.
-
Choose Your Tool: Use a ruler, tape measure, or caliper.
-
Measure Internally: Measure wall-to-wall across the inside of the tube.
-
Know the Sizes: Standard receiver widths are 1.25", 2", 2.5", and 3".
-
Avoid Mistakes: Don’t measure with a sleeve or estimate by eye.
-
Double Check: Re-measure if there’s rust, paint, or welded edges.
This simple process prevents rattling accessories, mismatched locks, or worse, unsafe towing conditions. If your trailer’s riding nose-up, your lock won’t seat, or your hitch rattles like a toolbox, you’ve got a problem.
That’s all you need to know about measuring hitch receiver size but if you want to finish the process with no mistakes you don’t stop here.
Keep reading to learn how to measure drop height, and avoid costly fitment mistakes.
Why Your Hitch Receiver Size Is the Foundation of Safe Towing
Getting your hitch receiver size right isn’t just a nice-to-have, it’s the starting point for everything that follows.
Towing, locking, and load balance all depend on one thing: knowing your receiver’s true size.
What Is a Hitch Receiver?
Your hitch receiver is the square, steel opening mounted to the rear frame of your vehicle.
Think of it as the “mouth” that accepts towing gear, like ball mounts, cargo carriers, or coupler locks. It stays fixed to your vehicle and is the anchor point for everything you attach.
Hitch Receiver vs. Ball vs. Shank
It’s easy to confuse the receiver with other towing parts:
-
Hitch Ball: The round metal knob that connects to your trailer’s coupler.
-
Shank: The solid bar that slides into the receiver tube, part of your ball mount or accessory.
-
Receiver: The tube itself, mounted to your vehicle, that the shank slides into.
Each part plays a different role. Measuring the wrong one? That’s how misfits happen.
Why Size Accuracy Matters
Receiver sizes are standardized by inner width, not outer edges, and usually come in 1.25", 2", 2.5", or 3". Even a minor mistake can:
-
Make accessories loose or impossible to install
-
Create wobble or unsafe towing conditions
-
Lead to costly returns, damage, or security failures
At Proven Industries, we’ve seen it all, locks that don’t seat, accessories that rattle, and safety issues that could’ve been avoided with one accurate measurement.
Step-by-Step Guide to Measuring Your Hitch Receiver Size (Without Guesswork)
Measuring your hitch receiver should be simple, but we’ve seen firsthand how often it goes wrong.
A slightly off guess can mean loose mounts, rattling accessories, or locks that simply won’t fit. So let’s walk through it the right way, no assumptions, no dealer myths, and no measuring the wrong part.
Step 1: Locate the Hitch Receiver
Your hitch receiver is the square steel tube mounted to the rear frame of your vehicle. It’s where you slide in ball mounts, bike racks, or locks.
This is what you're measuring, not the ball mount or the hitch ball.
Step 2: Clean the Receiver
Before measuring, make sure the inside of the receiver is:
-
Free of debris like dirt or rust flakes
-
Clear of reducer sleeves or inserts, many people mistakenly measure the sleeve, not the receiver
If you see a plastic or metal lining, it might be an adapter. Remove it.
Step 3: Use the Right Tools
Choose one of the following:
-
Tape measure – Quick and accessible
-
Ruler – Works if it fits snugly inside
-
Calipers – Best for precision
Make sure you’re measuring across the inside opening, wall to wall, not the outside edges, not corner to corner, and not diagonally.
Step 4: Take the Measurement
Insert your ruler or tape measure straight across the receiver tube’s opening, edge to edge. You’re looking for one of four standard sizes:
-
1.25 inches (compact cars, small SUVs)
-
2 inches (most SUVs and half-ton trucks)
-
2.5 inches (¾ and 1-ton trucks)
-
3 inches (Ford Super Duty, some commercial vehicles)
Even a ¼” difference matters. A 2.5” receiver with a 2” shank will rattle. A 2” lock won’t fit in a 2.5” tube. Always go by internal width only.
Step 5: Confirm It's Raw Receiver, Not a Sleeve
If you're using a reducer sleeve (common on trucks with 2.5” or 3” receivers), pull it out before measuring.
Our support team has seen dozens of cases where customers unknowingly measured the adapter instead of the hitch.
Step 6: Double-Check for Distortions
Still unsure? Look for:
-
Welded lips or tapering that can mislead
-
Rust buildup that makes the receiver seem smaller
-
Paint or powder coat that alters true dimensions
Use a clean, dry cloth to wipe the surface and take a second measurement if needed.
Getting this step right makes everything else, from locks to drop hitches, fall into place.
And if there’s ever a doubt, Proven Industries is just one photo away. We’ll match your receiver to the exact lock or accessory that fits.
Next, we’ll cover how receiver height plays just as critical a role in safe, balanced towing.
Helpful Resource → Hitch Sizes Explained: Classes, Receiver Size + GTW & TW Limit
Why Measuring Drop Height Matters as Much as Receiver Size
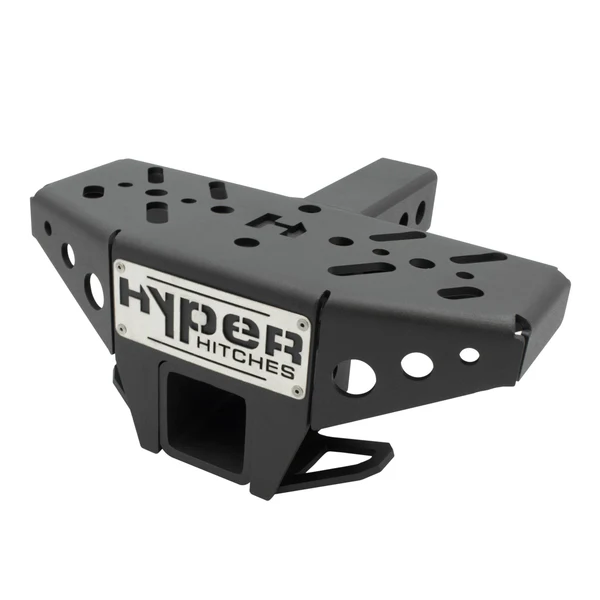
Product details: Hyper Hitches M255 Adjustable Drop Hitch
Knowing your hitch receiver size is just half the story. The other half, just as important, is getting your drop height right.
What Is Drop Height (And Why It Matters)?
When your trailer connects to your vehicle, the goal is for the trailer to sit as level as possible. If your hitch sits too high, the trailer tongue points down (“nose down”). Too low, and the tongue points up (“nose up”).
Either way, it throws off the balance. This affects:
-
Steering control
-
Braking effectiveness
-
Tire wear and axle stress
-
Weight distribution and load shift
In short: a bad drop height turns a safe tow into a risky ride.
How to Measure Drop Height Properly
It’s easier than most people think. You just need two key measurements:
-
Hitch Height
-
Park your tow vehicle on flat ground
-
Measure from the ground to the inside top edge of your hitch receiver
-
Coupler Height
-
Park your trailer level
-
Measure from the ground to the bottom of the trailer’s coupler (the part that sits over the ball)
Use This Proven Formula for Perfect Drop
|
Hitch Height – Coupler Height = Required Drop |
For example, If your hitch height is 20” and your coupler height is 16”, you need a 4” drop. If the coupler is higher than the hitch, you need a rise instead.
Getting this number right helps ensure a level, balanced trailer, and when paired with the correct receiver size, it’s the difference between a good tow and a great one.
The Hidden Dangers of Using the Wrong Hitch Size (And Mistakes to Avoid)
Measuring wrong doesn’t just lead to frustration, it can lead to failure. We hear it all the time:
“Will forcing this lock scratch my receiver?”
“My 2” shank rattles like crazy, I thought it fit.”
Behind these questions is the same root cause: someone didn’t measure their hitch receiver correctly. And when it comes to towing and trailer locks, close enough isn’t safe enough.
Why the Wrong Size Isn’t Just a Nuisance, It’s a Risk
Using a hitch accessory that doesn’t match your receiver size creates more than just an annoying rattle. It introduces movement, stress, and wear in places they were never designed to handle:
-
Noise & Rattle: Loose shanks or locks shake during every stop and turn.
-
Instability: Poor fitment throws off weight distribution and control.
-
Surface Damage: Forcing a tight fit scratches paint, exposes metal, and invites corrosion.
-
Component Failure: In extreme cases, vibration can loosen pins or cause fatigue in welds and tubes, especially at highway speeds.
That’s why locks are less forgiving than other accessories. A cargo carrier might wobble. A coupler lock that doesn’t seat properly? That’s a security risk.
Common Mistakes People Make When Measuring
To help you avoid these issues, here’s what to never do:
-
Don’t measure the outer walls of the receiver, always measure the inner width.
-
Don’t measure with a reducer sleeve inserted, remove any adapter before you start.
-
Don’t estimate by eye, even being off by ¼” is enough to cause problems.
-
Don’t assume “standard size” applies to all vehicles, OEM towing packages vary widely.
-
Don’t ignore rust or welded lips, these can distort your reading or hide the true shape.
One wrong measurement can mean the difference between peace of mind and pulling over to adjust a bouncing trailer on the side of the road.
So, now you know everything about measuring the hitch receiver size and the importance of doing that correctly.
Helpful Resource → Is a 2-Inch Hitch the Standard Hitch Size? What You Need to Know
Still Not Sure? Here’s What to Do Next
Even with the right tools and steps, some setups just don’t play nice. Maybe your receiver’s tucked behind a custom bumper. Maybe rust or an old sleeve is throwing off your measurement.
Or maybe you just want to be absolutely sure before buying.
At Proven Industries, we help trailer owners avoid costly misfits every single day. If you're stuck, here’s what to do:
-
Send Us a Photo: Snap a straight-on picture of your hitch receiver and email it to support@provenlocks.com. We’ll identify the size and recommend exactly what fits.
-
Use Our Lock Fitment Guide: Prefer to explore yourself? Visit our Coupler Lock Fitment Guide for easy self-matching.
The right measurement is peace of mind.
When your hitch fits right, everything else just works, from locks to trailers to the road ahead.
← Older Post Newer Post →